1.Introduction
WordPress is an open-source publishing platform that can be used for setting up a blog or website easily. In fact it’s one of the most popular publishing platforms on the web. Setting up a WordPress install on your own domain can be done by following these simple steps:
2.Signing In
Go to https://domains.unf.edu and click the Sign-up/Sign-in Dashboard link in the upper right corner.

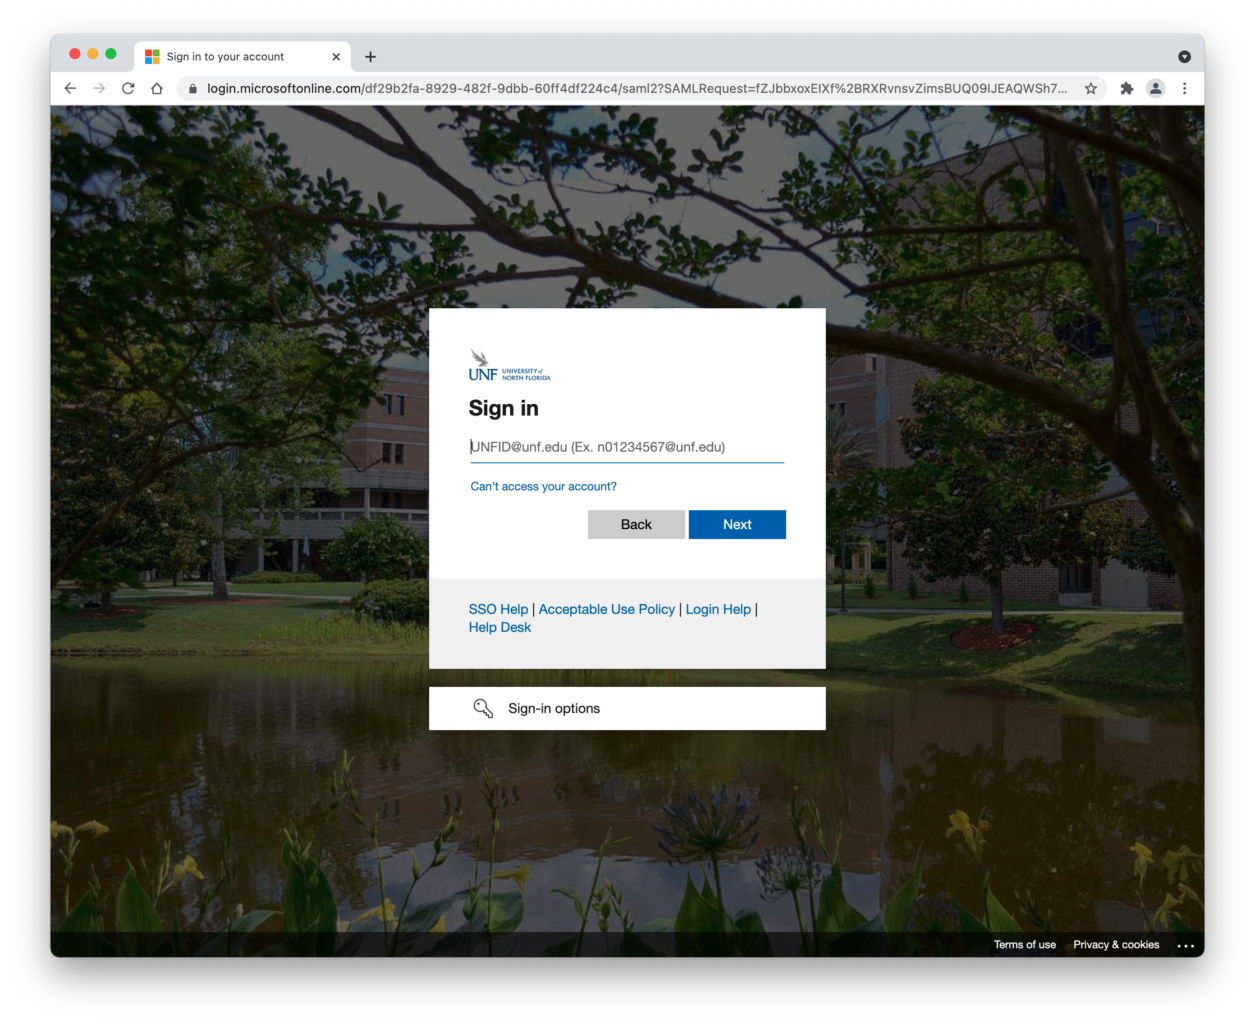
You will be directed to login using your UNF ID and password.
Note: You can also access Faculty Domains through myWings. Click on Faculty Resources, then Faculty Tools, and then select Faculty Domains.

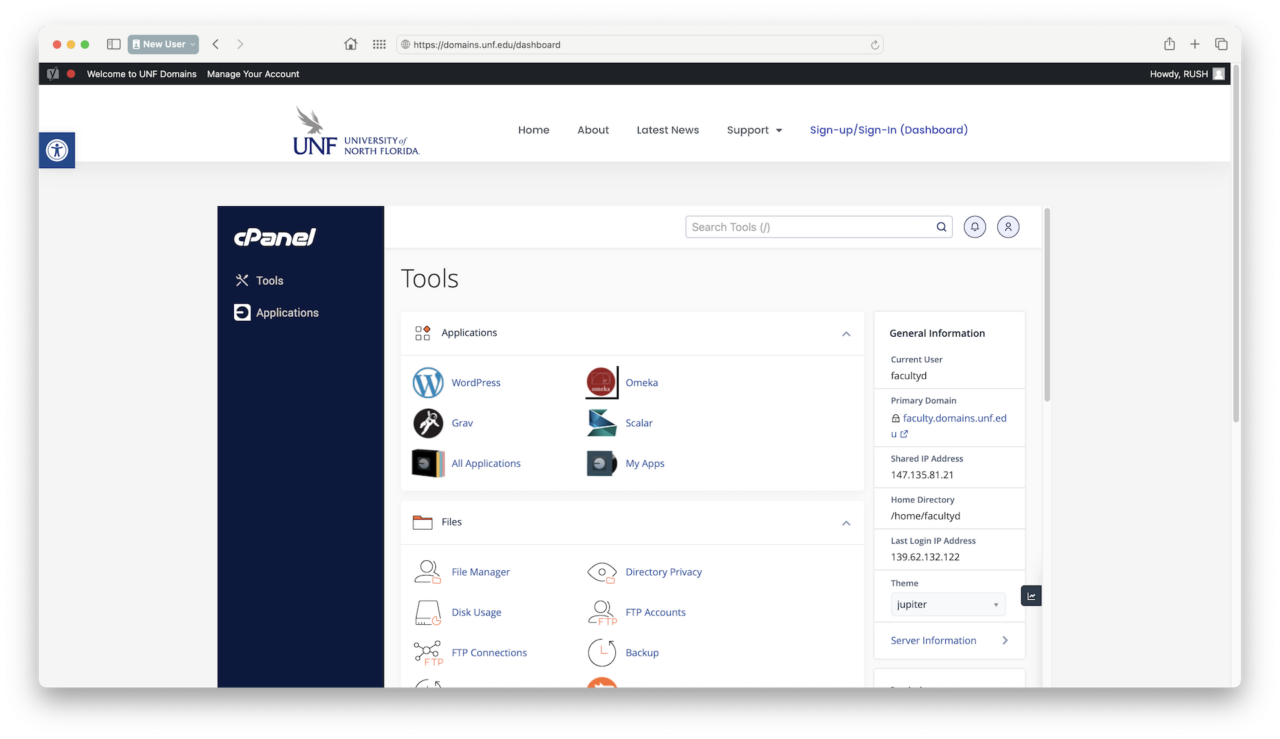
Clicking on the Dashboard link will bring you directly to your cPanel.
If you see a screen that asks you to choose a domain, you haven’t signed up yet, so you need to Get Started with a UNF Faculty Domain.
3.Installing the WordPress Application
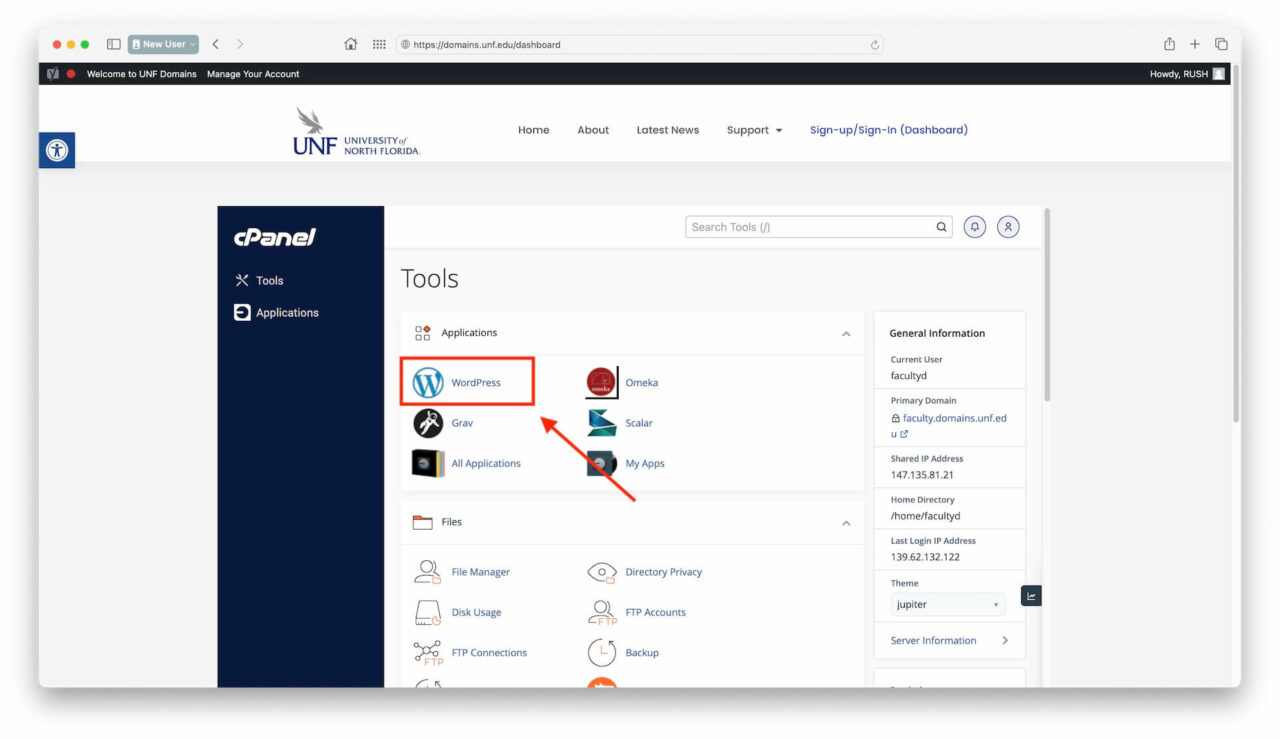
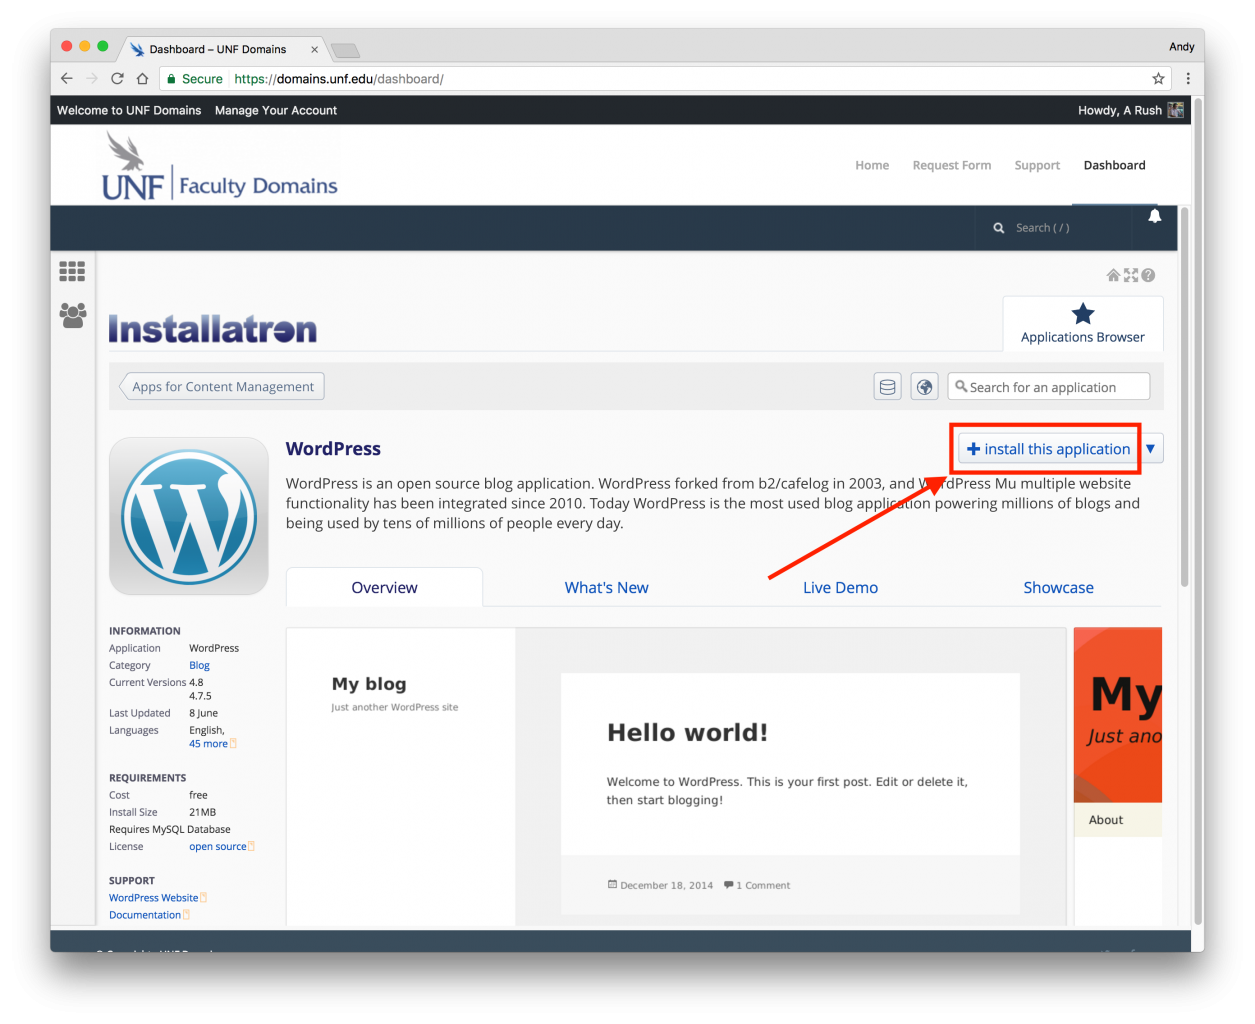
From your cPanel (Dashboard), locate and click the WordPress Application icon.
You will now see the Installatron WordPress screen. It presents you with loads of information about WordPress including what the latest version is, What’s New, a Live Demo, and a Showcase of sites using WordPress. Explore these if you would like.
When you’re ready, click the + install this application button. (NOTE* – don’t click the down arrow at the end of the button – that’s for importing from an existing installation).
You will then be presented with the Installatron WordPress Wizard screen.
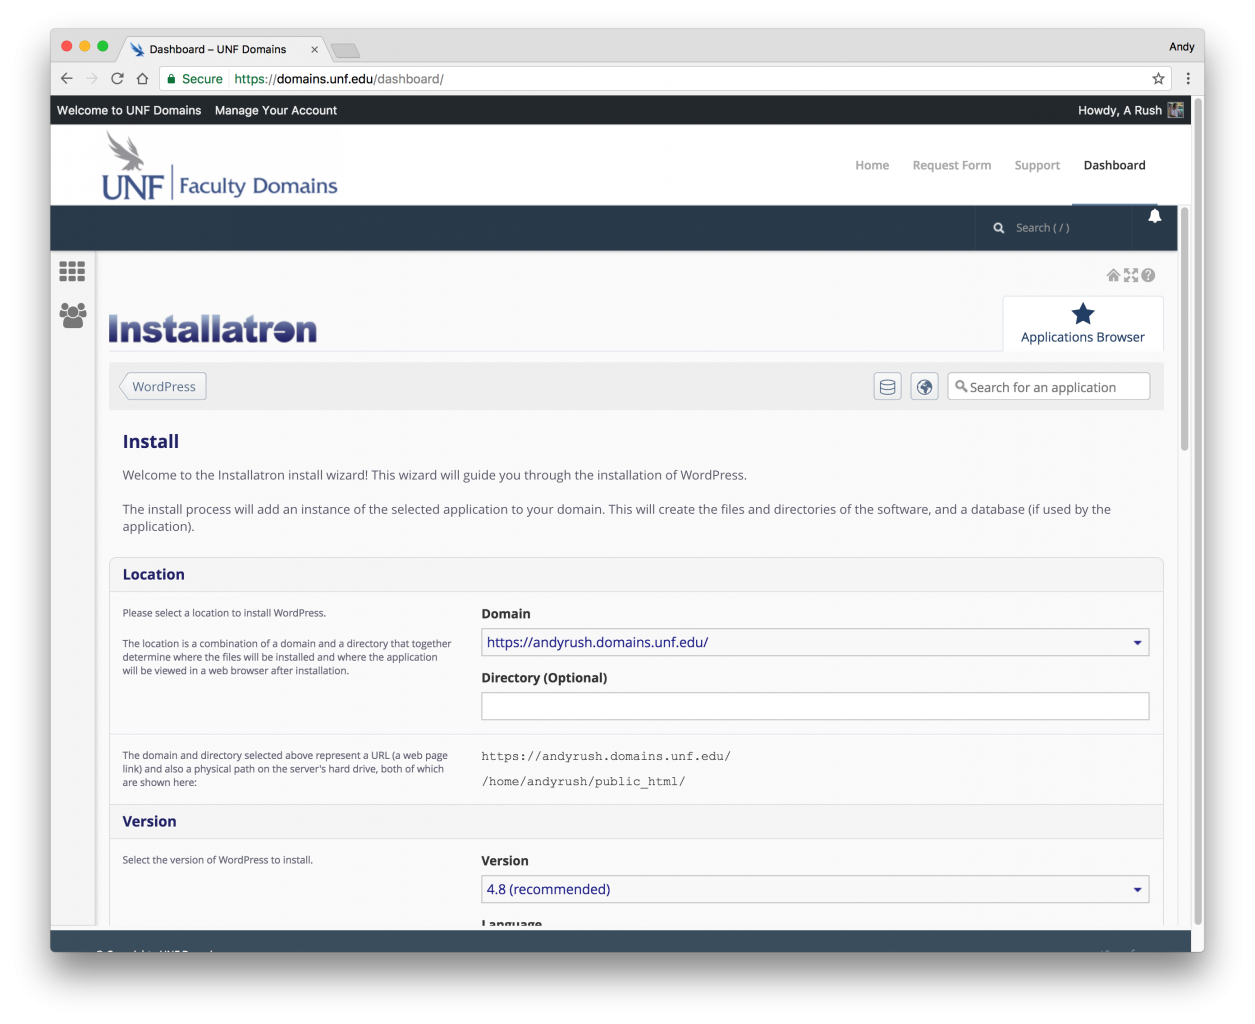
There are several sections to the Install screen, so we’ll go over each section and the available options.
The first section is Location. You need to set two options here – the Domain and the Directory. For the Domain, we recommend using the domain that starts with https://
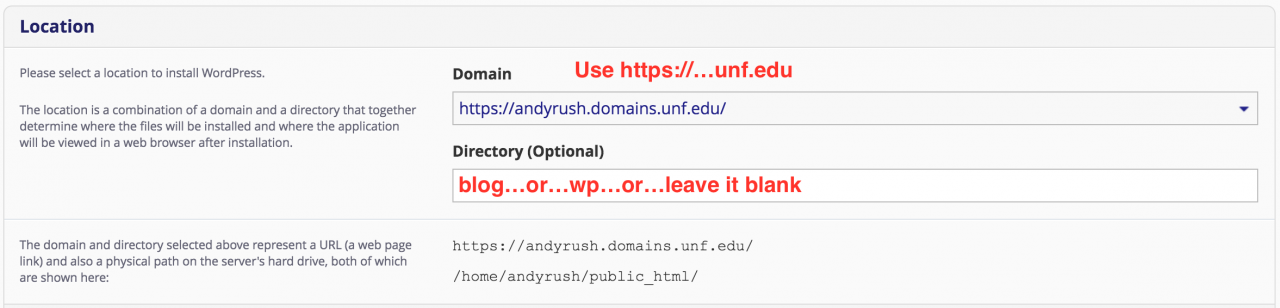
For the Directory, you have the option to leave it blank, which will install WordPress into what’s called the root. This is for installing WordPress as your main site. Visitors would go to your domain, in this case https://andyrush.domains.unf.edu, and they will see the WordPress home page. If you choose to enter a directory name, like blog, or wp, or anything else, visitors wouldn’t see your WordPress home page unless they added the directory name to the address – for example https://andyrush.domains.unf.edu/blog. You would generally add a Directory if you were installing another instance of WordPress on your domain in addition to the one installed at the root.
The next section is Version. The section can go largely unchanged. We generally recommend the latest version. Look for the version that adds the parenthetical (recommended).
With UNF Faculty Domains we have built a custom template, called UNF Faculty Template, that is selected by default. It consists of a UNF-styled theme and some recommended plugins. We recommend you choose the UNF Faculty Template because it will give you a head start toward building your website and you will still be able to customize the theme and add plugins later. If you want to install a plain (“clean”) version of WordPress, then choose “Give me a clean WordPress Install”. We also have a few other templates to choose from with descriptions of what they do so feel free to experiment. Remember, you can install more than one website in your Faculty Domains space.

Continuing with the Version section, you have a few more settings to choose from.

New minor versions and security releases come out on a regular basis. In a lot of cases the updates can fix security bugs and holes. We recommend you change Automatic Update to Update to new minor versions and security releases. You can leave WordPress Plugin Automatic Update and WordPress Theme Automatic Update on, as well as Automatic Update Backup on. We basically want to keep everything up-to-date and backed up!
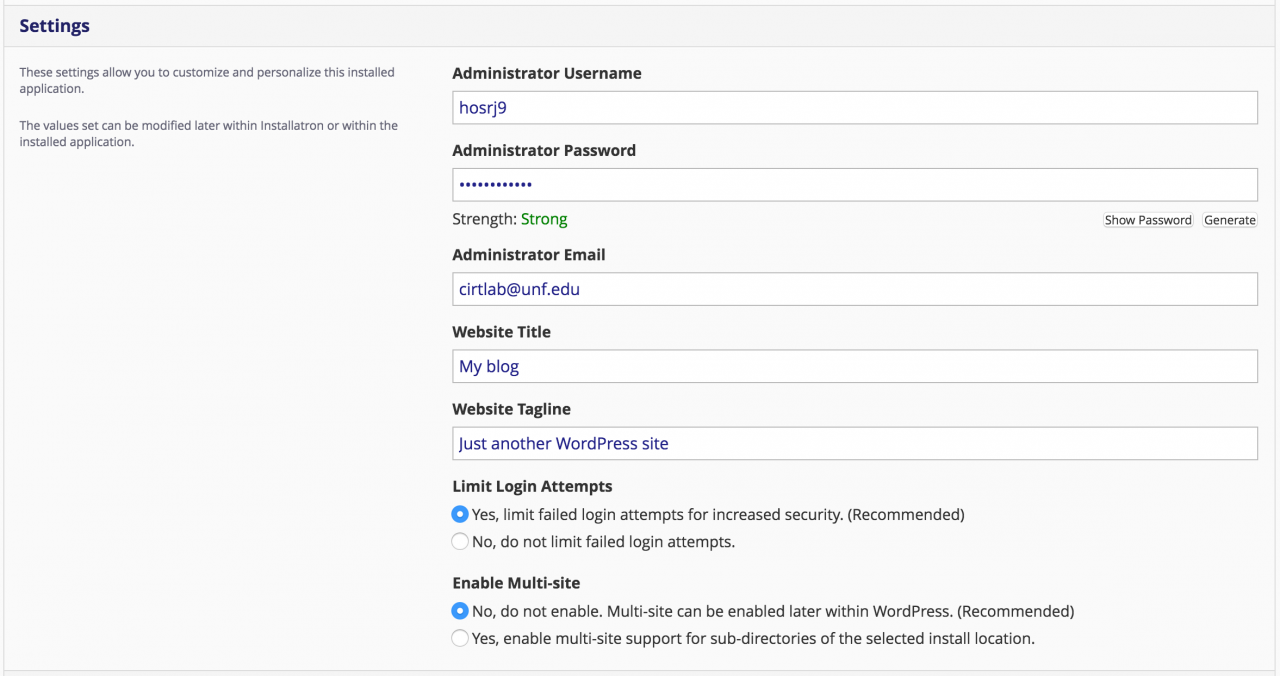
The next section is the Settings. Think of these settings as the “keys” to your WordPress installation. The Administrator Username and Password are automatically generated, and we highly recommend you keep them. We want our sites to be as secure as possible. The Administrator Username will look kind of strange. That’s ok. If you click on the Show Password button in this section, you will see a monster of a password. That’s good also. The less people are able to guess at both the username and the password the better.
How will you remember this username and password combination? Well you should use a system to manage your passwords, but actually you can access your WordPress administrator area (also known as the WordPress Dashboard) from the cPanel. We’ll show you that shortly.
The Administrator Email is how your WordPress site will contact you about administrative stuff, like comments that have come in, or other things that need attention. Your UNF email address is required. The Website Title and Tagline can be changed or not. You’ll have the option to change it anytime once your site is set up. Leave the last two settings, Limit Login Attempts, and Enable Multi-site, as is.
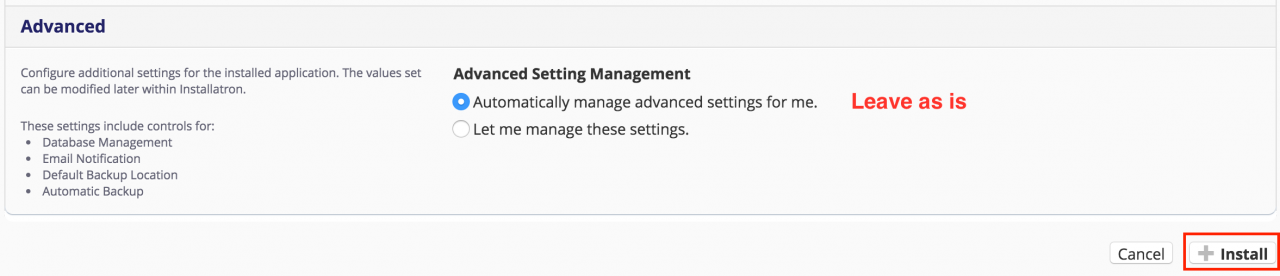
The last section is the Advanced section. Leave the setting for Advanced Setting Management as is. You definitely want Automatically manage advanced settings for me to be selected.
When you’re ready, click on the Install button.
Now the system will do some behind-the-scenes work configuring your WordPress site. You’re almost done.
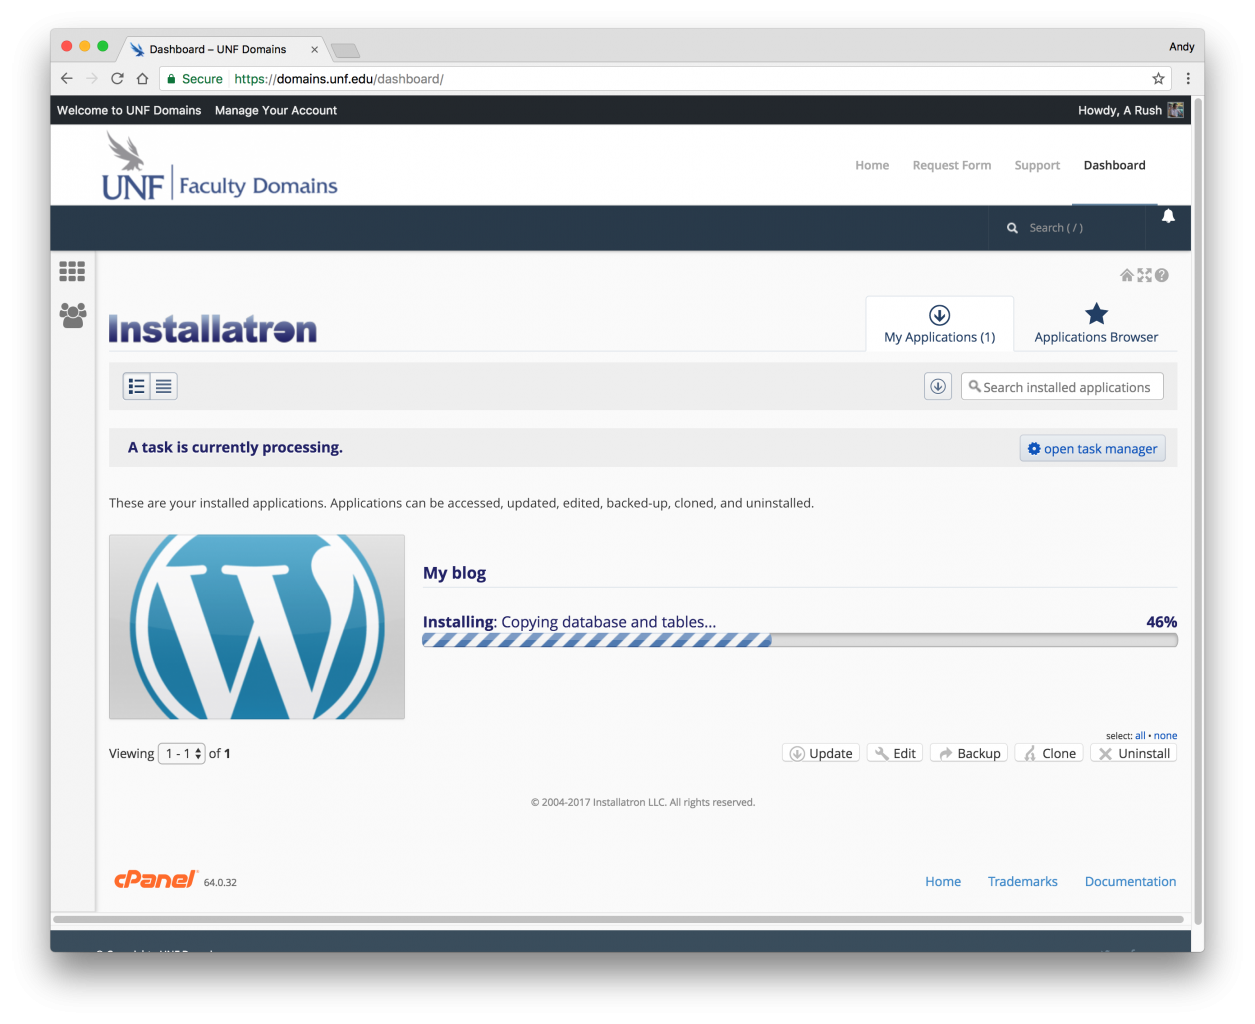
When the install progress bar reaches 100%, you should soon see the following screen:
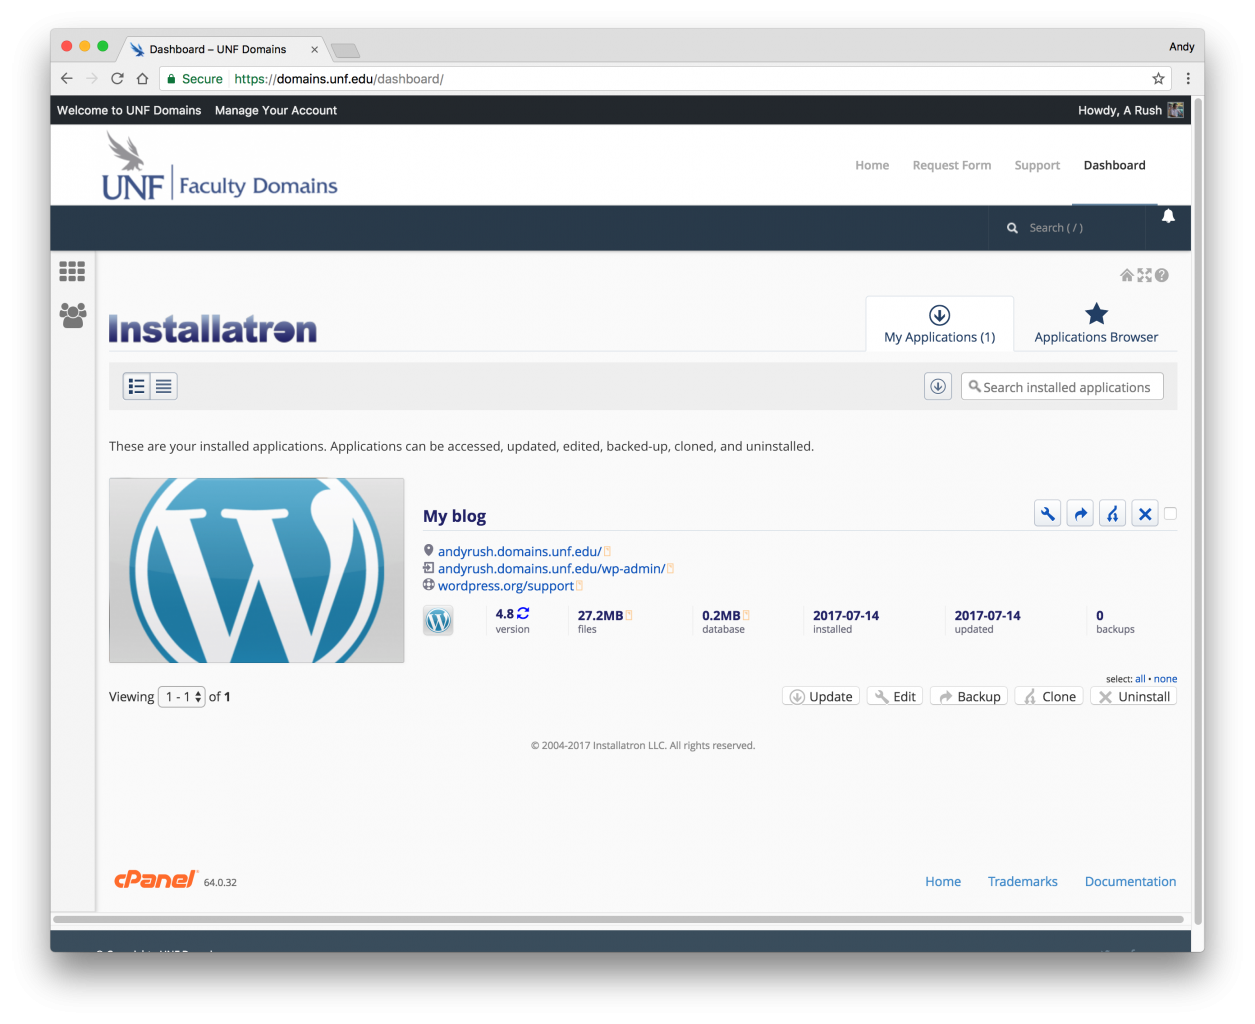
It’s time to celebrate because you have successfully installed WordPress! We will provide you with much more documentation showing you how to further configure and setup your new WordPress installation, but for now you may want to know two important things. First, how to see your brand new WordPress website. And second, how to see the administrative area to not only configure your new site, but to actually post new content.
In the example screenshot above, you see the WordPress application entry. In this case it’s listed as My Blog. To see what the website looks like, click the first link – in this example case – andyrush.domains.unf.edu. Your domain link would obviously be different. To enter into the administrative area, also known as the WordPress Dashboard, click the second link – again in this example case – andyrush.domains.unf.edu/wp-admin.
*IMPORTANT – You’ll notice that you don’t have to type in a username and password when you click the /wp-admin link. That’s because you are already logged in to the cPanel of your domain. If you wanted to get straight into your WordPress Dashboard by not going through cPanel you would type in your domain with /wp-admin at the end of it into a web browser address bar and hit Enter/Return.
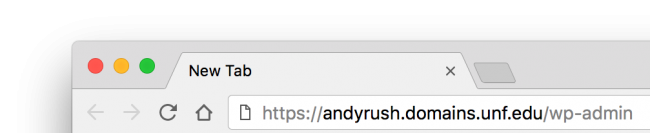
You would then be directed to the WordPress login screen for your site. It would look like this:
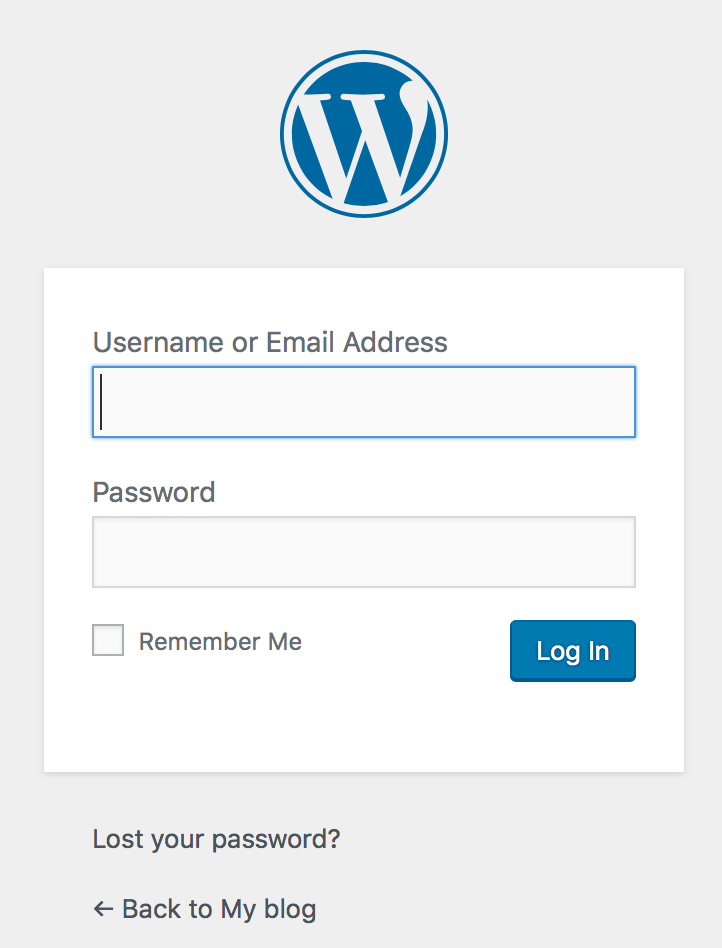
You may never need to (or want to) get into the WordPress Dashboard this way, but it’s always good to know this alternate route, for instance if you couldn’t login to your cPanel for some reason.
OK, that’s it. We’re done. Now you can either see more about WordPress, or maybe you’ve got other things to do right now.
4.Logging Out
When you are ready to logout of your UNF Faculty Domains account, you can follow these simple steps.
Move your mouse over your Profile name in the upper-right corner of the cPanel screen.
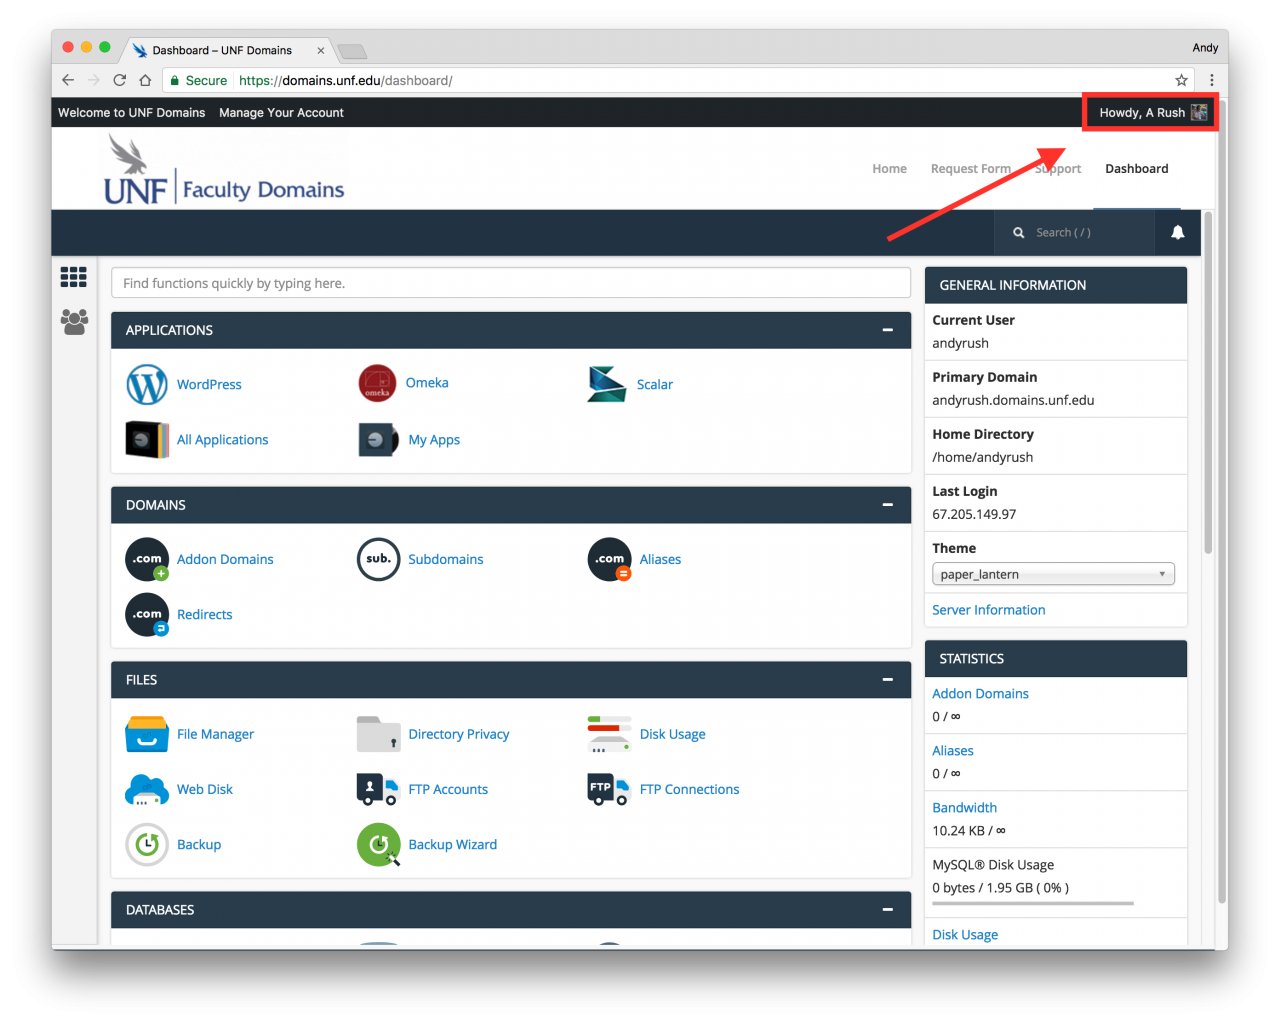
By simply “hovering” over your Profile name, a menu will drop down, showing a Log Out option.
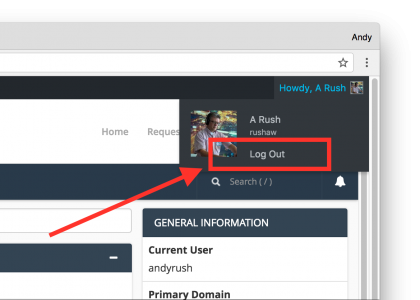
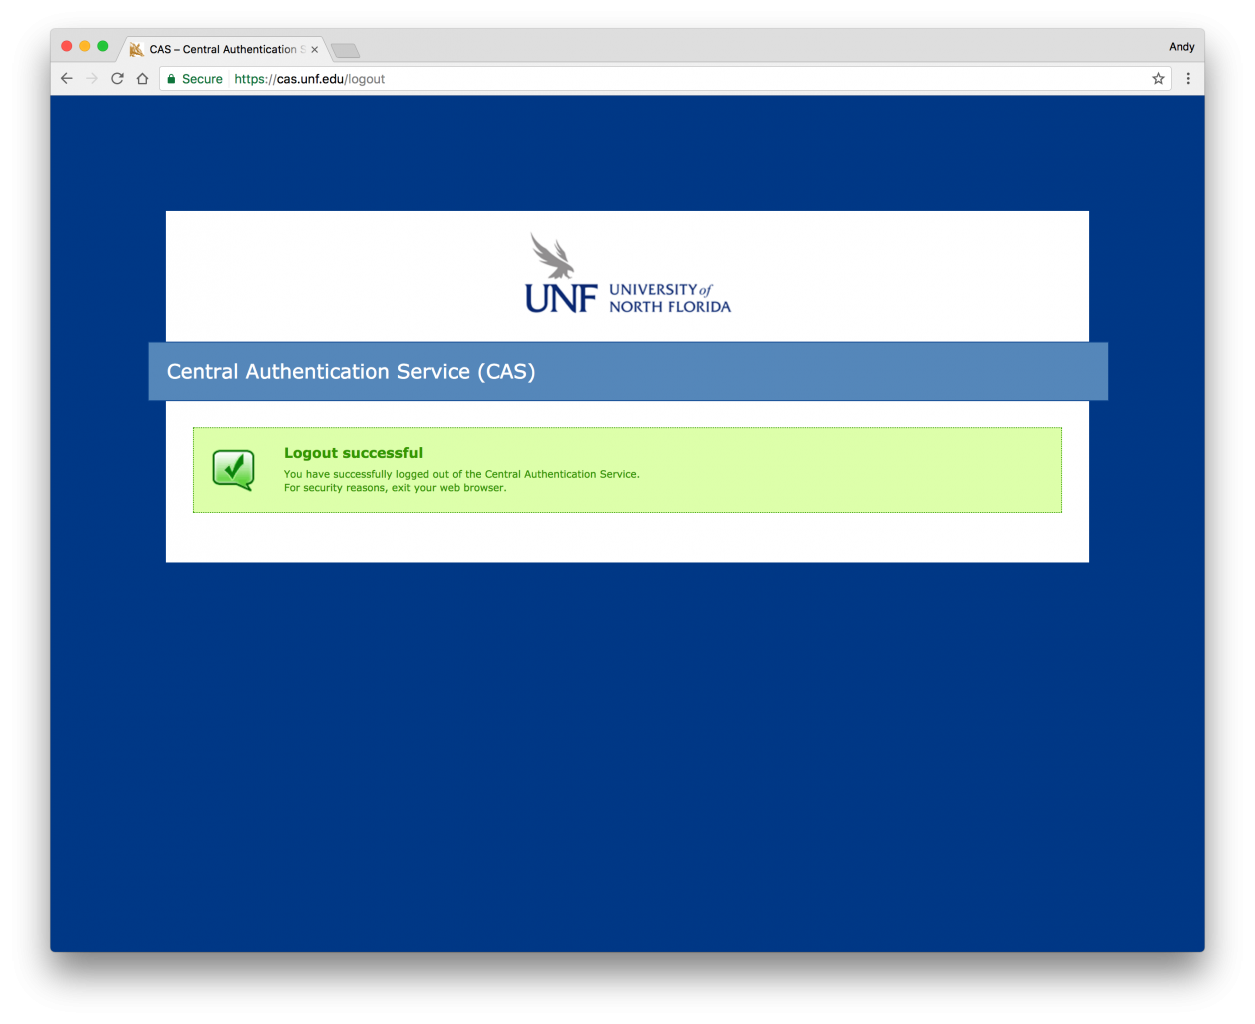
Click on the word Log Out and you will exit the cPanel and be presented with the logout screen.
NOTE* – As an extra security measure, exit the web browser that you are using after you have logged out.